This is a followup to a recent post where I wanted to break free of a little dependency on iron servers for simple tasks. The project has been a great fit for my goals. The original post can be found below.
Find the up-to date project at https://github.com/mtz4718/ecobee-circulate/tree/master
This post is going to be all about getting something running in azure. I really go pretty detailed on what’s actually happening because I found it pretty confusing at first and that confusion all came from the tools used. I haven’t seen any simple stupid examples of this so I really wanted to try and lay this out in a way that’s easy for others to get their hands dirty with some server-less code. Because of that there’s a lot of details here that might be obvious to some but they would have helped me get up and running fast had I understood them from the start. It’s been a tough learning process for me but it’s been well worth the effort because these kinds of solutions can be applied to so many problems that would normally require an actual server to run on.
This is also a work in progress. The method, code, and this post is subject to change as I work through optimizing the task.
What’s an Azure Function and what’s needed
So Azure Functions are a way to run snippets of code without having to worry about the underlying infrastructure. It’s a great example of Platform as a Service (PaaS). Python is still in preview and requires some specific tools to get it up and running. That’s really the biggest hurdle right now and that’s what I want to try and tackle. While there’s documentation on this stuff out there, there’s no concise spot where a solid example can be laid out for someone green like myself.
So for requirements please reference …
https://docs.microsoft.com/en-us/azure/azure-functions/tutorial-vs-code-serverless-python
However let me note a few things. That documentation calls out,
- An Azure subscription
- Visual Studio Code with the Azure Functions extension
- Azure Functions Core Tools
The first thing is that VS Code at this time is the only way to push python to Azure. The Azure Function Extension is what allows this. You cannot log into Azure and start typing away in the web browser. You have to have VSCode.
The Azure Functions extension is easy to install, no notes needed there. Search for it in the Extension Marketplace and install.
As for the Azure Function Core Tools, be sure you add it to the $PATH of whatever you’re using in VSCode, be it bash or powershell. The documentation above references this, don’t ignore it.
I’ll be using powershell in this example, it makes very little difference which you choose but I found powershell to be easier because I have multiple bash instances and windows linux subsystems installed making things a little muddy.
Lastly, you might as well install Docker for the Desktop as well. The reason being is that in order to install quite a few python modules, we have to build a virtual environment and package the python module dependencies. Basically the Azure Functions environment for Python does provide some packages by default but it’s pretty likely that you’ll run into some missing ones if you start importing anything beyond the basics. I found this to be true for Azure-Storage-Python which I’ll be using shortly, found here.
The take-away is to just install the following and avoid the headache and troubleshooting if you can.
- Install Docker Desktop https://www.docker.com/products/docker-desktop
- Install the Docker VSCode extension.
There may be some permissions that will have to be addressed here like adding your user to the newly created <docker-users> group if setting the environment up in windows. Any error message I encountered when trying to use these tools were accurate and pointed me to what sys environment variables or permissions needed to be tweaked.
Lastly I recommend installing additional Azure Extensions for VSCode like plan ‘ol Azure and Azure Storage, but those aren’t required for this.
What’s happening in VSCode
There’s some more bits that need to be understood about what is being accomplished in VSCode. The approach is to create a virtual environment and install and python modules/dependencies locally and then run the actual code locally as well. If starting with an existing python environment, this new environment will have no packages installed and any modules needed for the single project will need to be installed again. This virtual environment is what Docker zips up and sends to Azure Functions and that package carries the dependencies so Azure doesn’t have to have them for us. This is a pretty convenient way of handling this actually because we don’t need to push code to Azure multiple times trying to get something to work. The Azure Functions environment is actually reproduced locally and the code can be ran as if it’s in Azure, testing not just the code but imported modules as well. It’s the same as what would be experienced with the code running from Azure.
Understanding the tools used
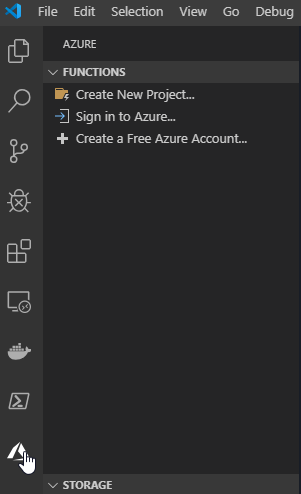
Assuming requirements are installed and we have a working environment, we’re ready to start building.
Selecting the Azure extension, get logged into an Azure account.
If you ever need to logout of an account, use Ctrl + Shift + P to bring up the VSCode command terminal and start typing, <Azure Sign Out>
Once logged in, create a new project and follow the prompts.
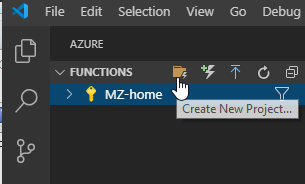
We have to pick a location to save the project. Once we determine where we want to save these, create a new folder for every project to keep things organized.
Complete the remaining prompts is VSCode

- Choose the desired Language, Python
- Choose the trigger, in this case a timer trigger
- Name the Function itself. This can be the same as the project name or whatever you’d like.
- Define the trigger, it’s in Cron format
- Choose how to open the project.
- Add to current workspace and open in current window do just about the same thing. Opening in current window opens the __init__.py for you where current workspace does not.
- Opening in a new window opens a new instance of VSCode.
At this point, nothing has been created in Azure. The Function Extension has built a virtual environment for us locally in the folder we’ve specified. It’s created all the files required for a working function and it could be deployed to Azure at this point, however it really wouldn’t do anything unless we start adding some code.
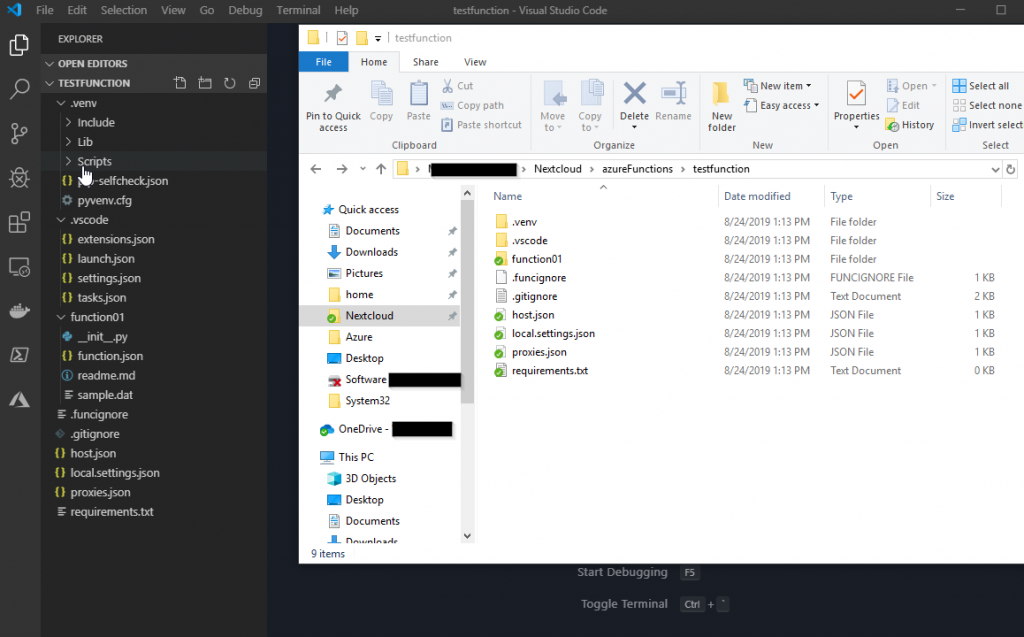
We can close this environment by going to File > Close Folder , to return to a blank VSCode environment. And we can re-open this environment by going to File > Open Folder and selecting the project folder we created. In the example above, this is testFunction.
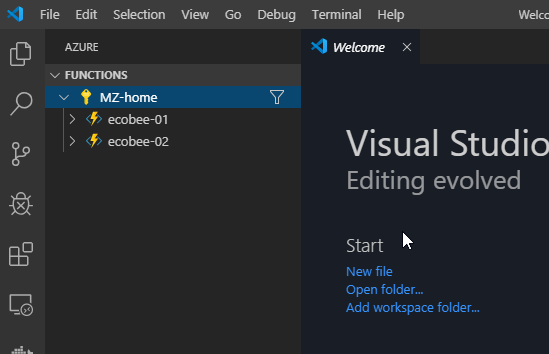
If we have a Project open, we will see that reflected in the Azure functions extension. If we don’t, we only see functions that are in Azure.
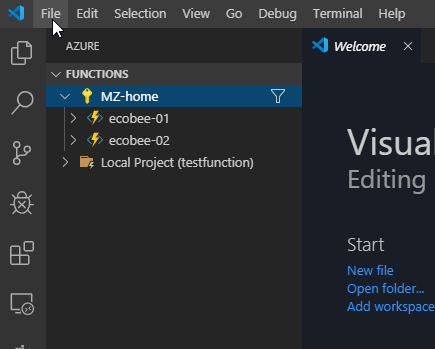
Confirming we’re in the virtual environment
When a new project is created and VSCode opens everything for us, we should also find that our terminal is automatically in the Virtual Environment. We can test this by opening a terminal (again either bash or powershell) and if the Virtual environment is loaded, (.venv) is prepended to the terminal prompt.

If this isn’t present, (Which happens when opening a project manually with File > Open Folder) just call the Virtual Environment with…
cd \FunctionFolder\
.venv\Scripts\activate
This virtual environment or venv is important when we start importing modules. When we install new modules for our code, we must run our pip install commands with this environment active. Otherwise we will be installing modules to our local system and not to the venv that will be uploaded to Azure.
Applying the code
With all that explained and out of the way, lets look at the actual code. The Function App extension starts us out with a basic Python file, __init__.py that is pre-built with the required bits needed for the trigger method chosen. In this case, a timer.
import datetime
import logging

import azure.functions as func


def main(mytimer: func.TimerRequest) -> None:
    utc_timestamp = datetime.datetime.utcnow().replace(
        tzinfo=datetime.timezone.utc).isoformat()

    if mytimer.past_due:
        logging.info('The timer is past due!')

    logging.info('Python timer trigger function ran at %s', utc_timestamp)
As mentioned, this can be deployed to Azure as is, it just won’t do much. I had (nearly) already prepared and tested the code I wanted to deploy to the Function in App so in this case, I just add it to the provided __init__.py. The contents of the blob below aren’t really that important. It’s just to give an example of placing a python script within whats provided.
Requirements / importing modules
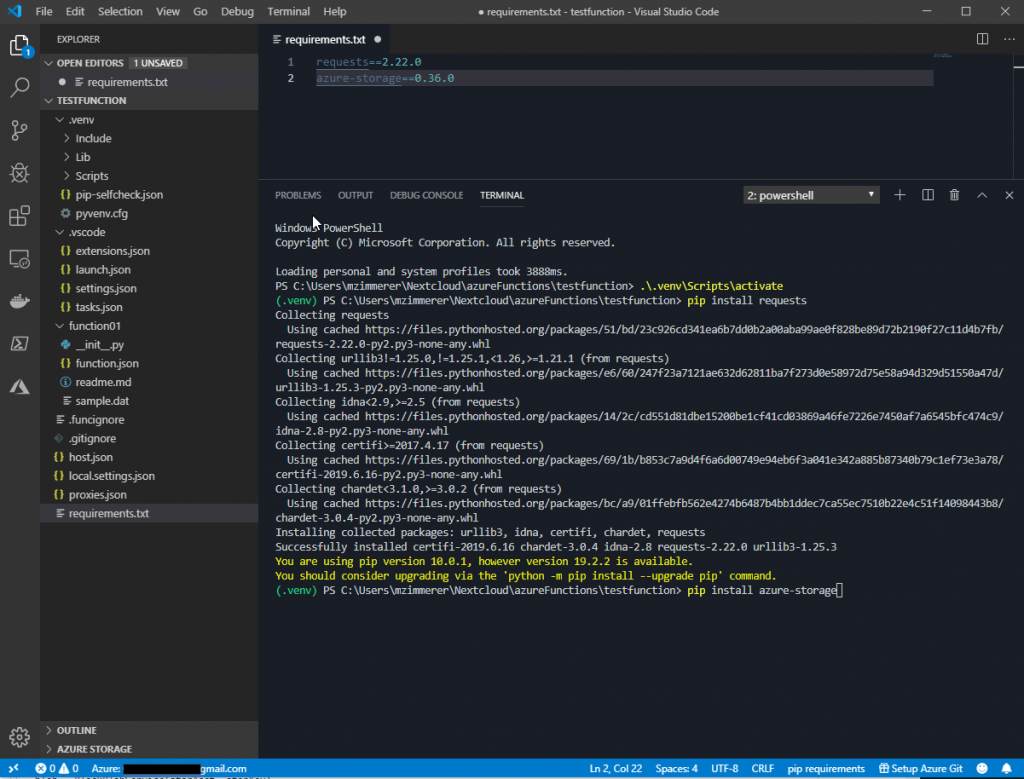
The most important thing above is the additional modules I’ve imported. Some do work as is in Azure such as json and ast, however other’s need to be both installed to the venv and specified in a <requirements.txt> document. This txt file was created for us by the extension, find it in your Project folder. Below you can see I’ve both added these modules to the .txt file and I’m installing the modules with pip in the venv terminal.
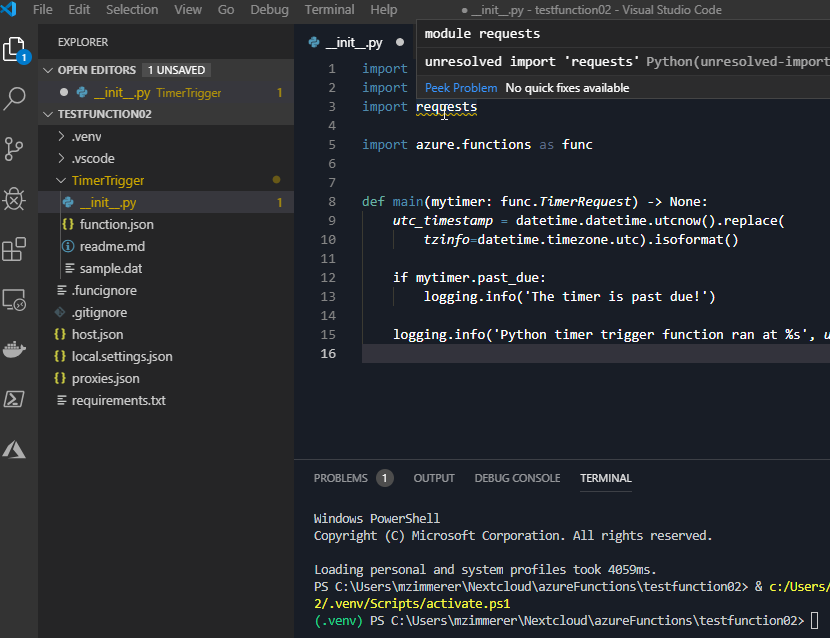
If there’s unmet dependencies it’s made obvious in VSCode. Assuming the venv is loaded, we can see that if I had not defined the requirements or installed the modules via pip, I would be warned. Additional warnings and errors can be found when deploying the app to Azure or when attempting to execute the code in Azure but there’s no reason to ever see those errors (like I did). If things don’t look correct here, it won’t work in Azure. I recommend not wasting time trying to deploy something that isn’t error free here. I tried it, didn’t work.
I had some problems finding appropriate module names and versions. I found the easiest thing to do was head on over to pypi.org and look up the modules there. Here’s requests for example.
https://pypi.org/project/requests/2.7.0/
Test and Deploy
With all that out of the way and ensuring that the venv is still active, I’m ready to test the code. I have a few lines of code that output some logs to an Azure Storage Blob so in addition to the output from the terminal, I can verify that the app ran correctly. And again, running this code locally is the same as it would be in Azure. This isn’t a “test” run. Anything the code is intended to do does happen. So in this case, my thermostat is being adjusted.
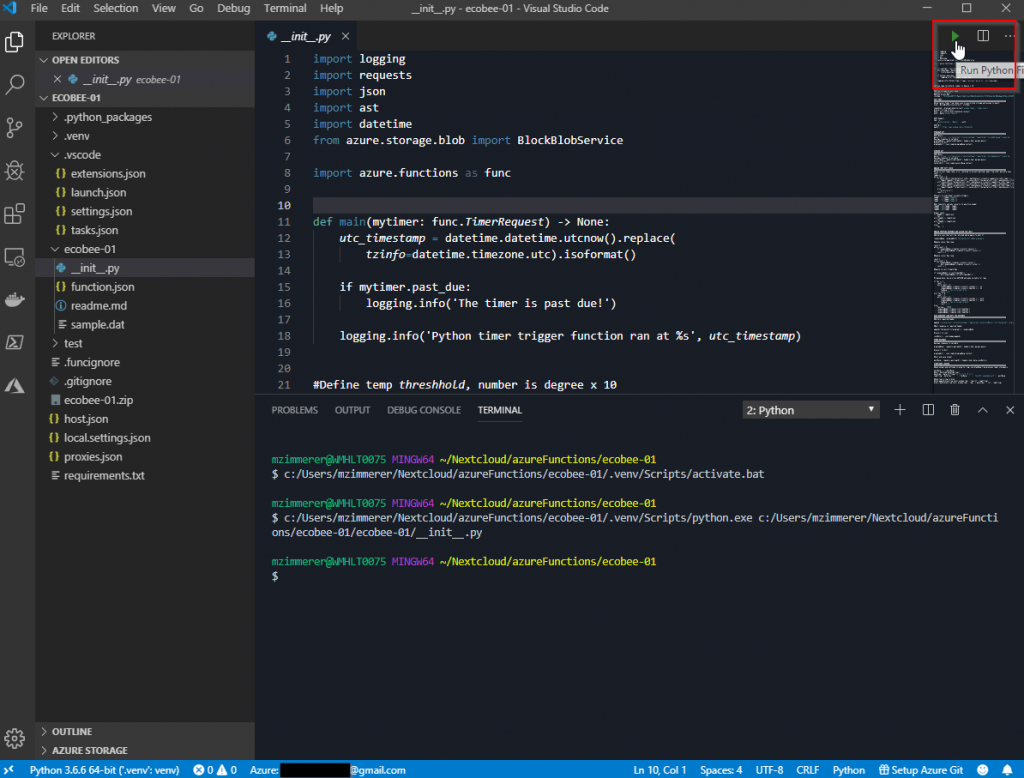
My function pushed a log file to a specified storage blob

With a successful test, I can now push to Azure with pretty good confidence.

Create a New Function App and give it a name, or create it in the Azure portal and select it. Mind your billing model!

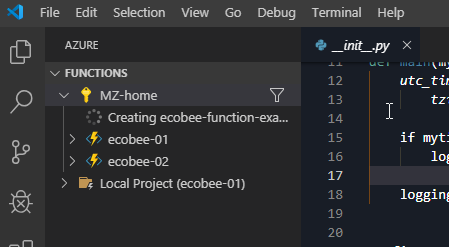
The extension and the Azure Function Tools will now go ahead and package everything up. If the deployment fails because of dependencies but then ask if you would like to try deploying with –build-native-deps, then accept and Docker will be called to pack the venv for Azure. Once complete we can see the Function App both in VSCode and within the Azure portal itself. From the Azure portal I can also manually run the code and get some basic logs back however in order to ensure everything within an app runs correctly, proper error checking is required.
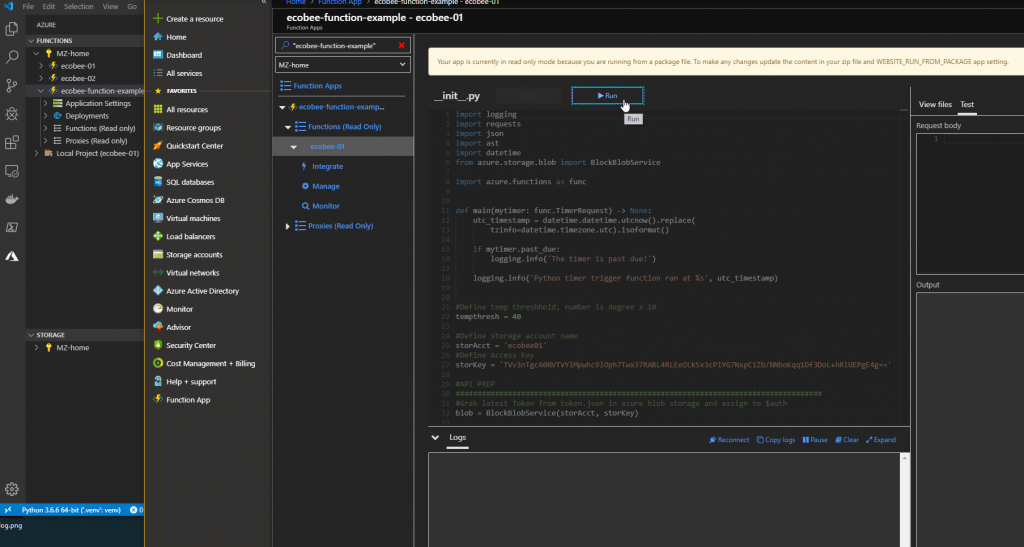
That’s it! I may do another post on how Azure Storage is leveraged here. With a hosted function app, there’s no local storage so something like AZ storage is required any time information needs to be retained, referenced, written or logged.
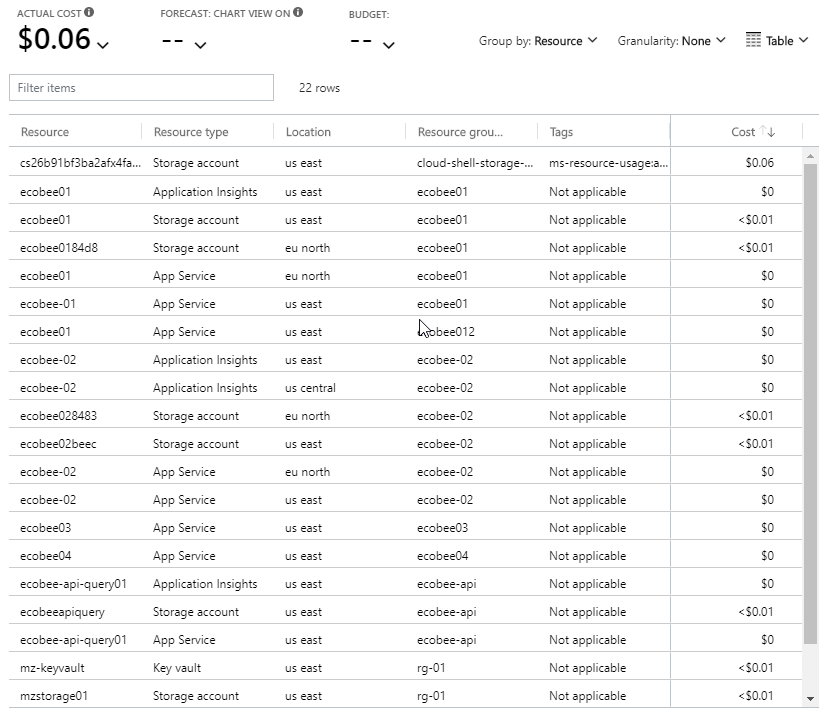
Oh, the last thing I wanted to touch on! this has been running every 15 minutes for about a week and I had multiple instances running for a bit while I was working out some kinks. There’s virtually no cost to a small script like what I’ve used.

I’m using the timer function as my first azure function … I’m wondering where the line:
logging.info(‘Python timer trigger function ran at %s’, utc_timestamp)
actually logs to?
The rest of your code is very helpful in understanding how to build something more substantial than the usual examples one finds googling.
Thanks
Sorry for the delay on this, I don’t check comments much because most of it is spam. Just in case you were still wondering it logs to application insights, a resource that Azure turns up when the function app is built. Other meta data such as execution initiated, succeeded/failed are logged here and are reflected in some basic graphs for monitoring.