I was having a conversation on reddit about setting up apple devices on certificate based 802.11x over a year ago and since then, I’ve received quite a few PM’s asking for details or instructions. I’ve been meaning to throw the internal instructions I wrote up into a sanitized blog post to start referring people to. Welp, this is it. Straight to the point and more like a how-to. This is assuming the NPS server is already up and running.
Windows Server NPS RADIUS certificate based authentication pre-reqs
A Certificate Template for the Apple Devices has to be created.
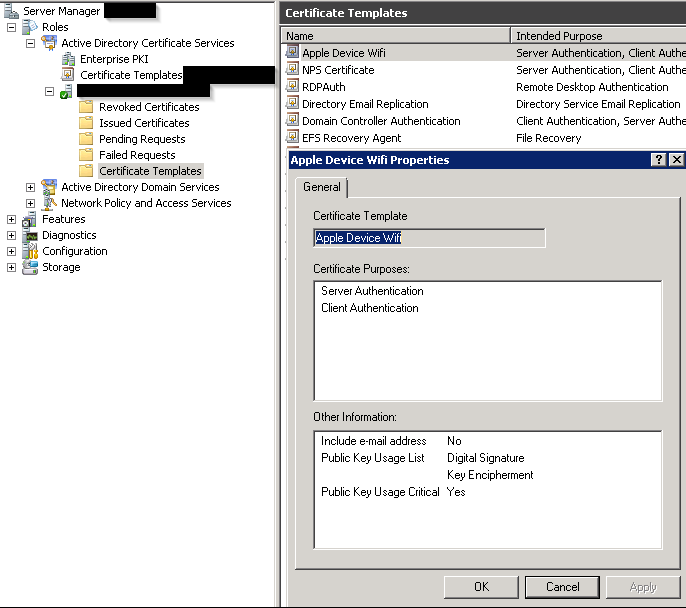
The most important setting here is that the Subject Name will be supplied in the request
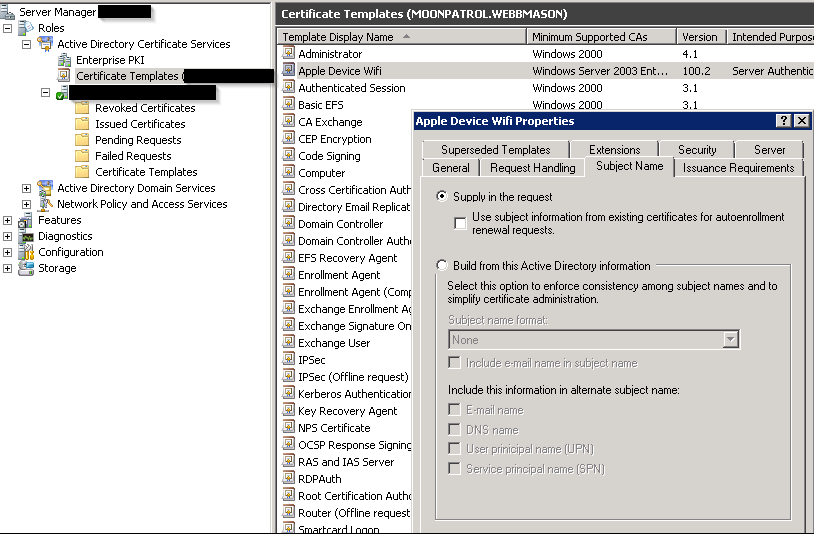
When Apple Devices attempt to authenticate to 802.11x, they will use their Machine or Hostname but present it as an LDAP user. This is not something we can change. The setting above allows this action. In addition, that Machine or Hostname must be found in Active Directory. An OU can be created for these machines.
In that OU, A USER Account must be created for each Apple Device and that user must be associated with the appropriate Certificate as well as have the same username as the devices hostname. This is detailed in the How-To instructions, but see example below.
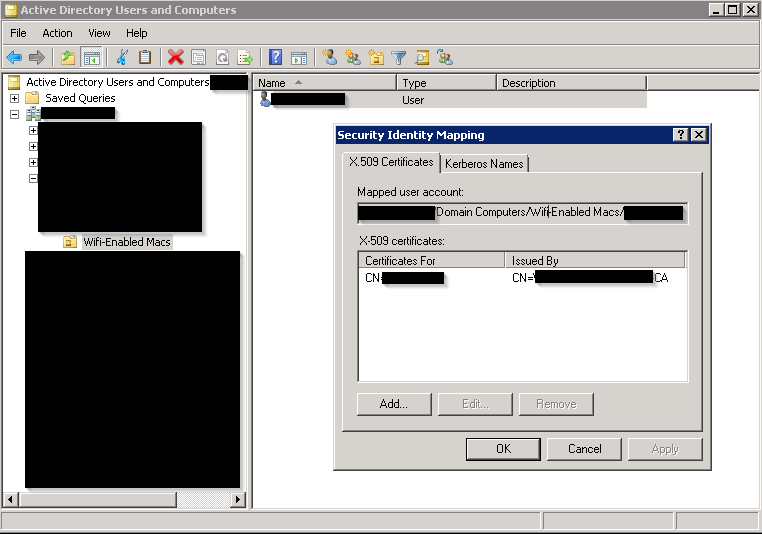
It’s a good idea to also create a Group Policy that prevents login from these accounts.
How To
To add an Apple Device to the wifi, first we need to create, sign, and export a Certificate.
Run mmc.exe as Administrator on your workstation. Once open, click File -> Add Remove Snap-ins.
Select Certificates from the list and specify Computer Account,
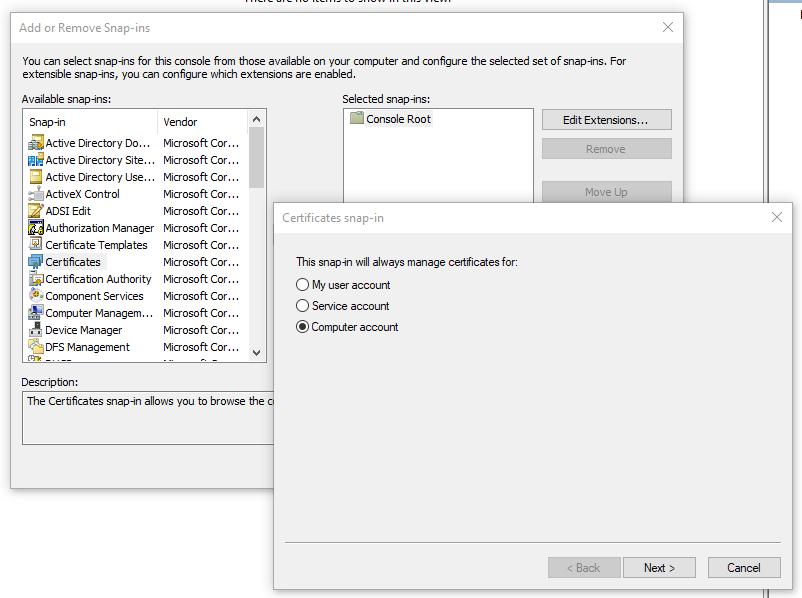
Click Next and select Local computer,
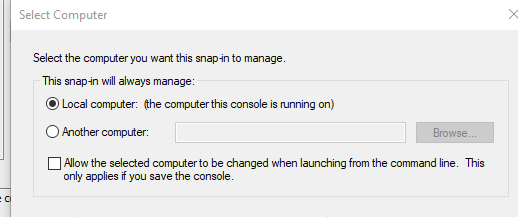
Click Finish and then Click OK to close the Add or Remove Snap-ins Window.
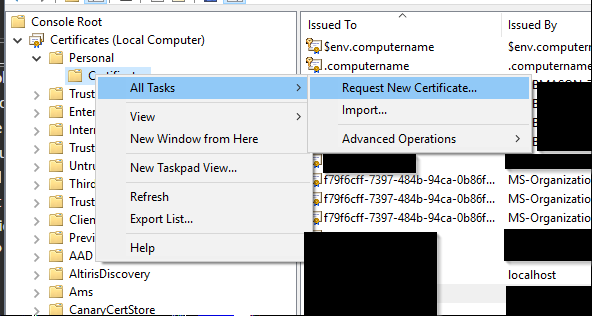
Expand Certificates (Local Computer), Then Personal.
Right Click Certificates and select All Tasks and then Request New Certificate as seen below.
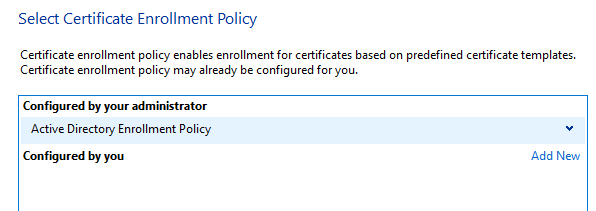
Click next to skip the “Before you Begin” window and ensure on the next page, Active Directory Enrollment Policy is selected as seen below and select Next.
The next page will allow you select which type of Certificate you would like to request. We want the Apple Device Wifi Certificate. Follow the Prompt and click the Blue Alert to Configure settings.
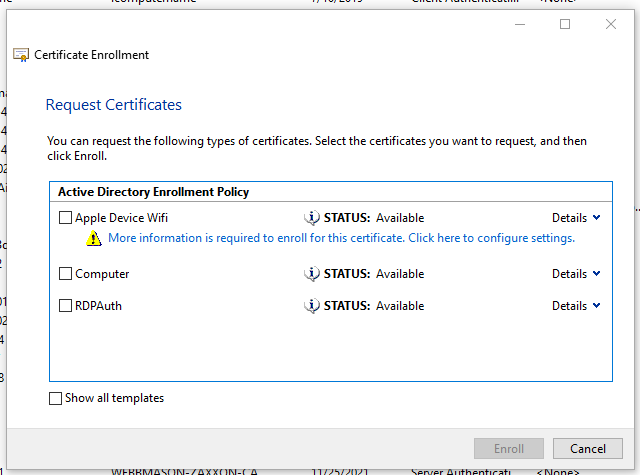
The only bit that needs configured is that we need to Add a “Common Name”. This should match the Machine or Hostname of the target Apple Device.
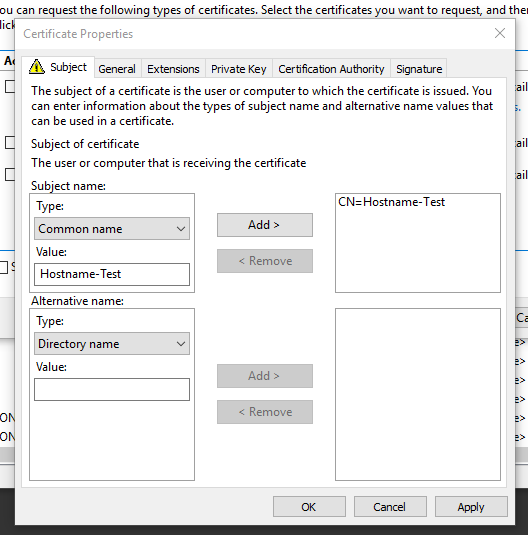
If you’re unsure of the hostname, open a terminal on the Apple device. Note that the hostname is displayed. To verify, use the hostname command to display the full name. We do not need the TLD, only the first bit of the response.
Once complete and Properties window is closed, the Alert should be gone. Click the Checkbox for the Apple Device Wifi Certificate and click Enroll.
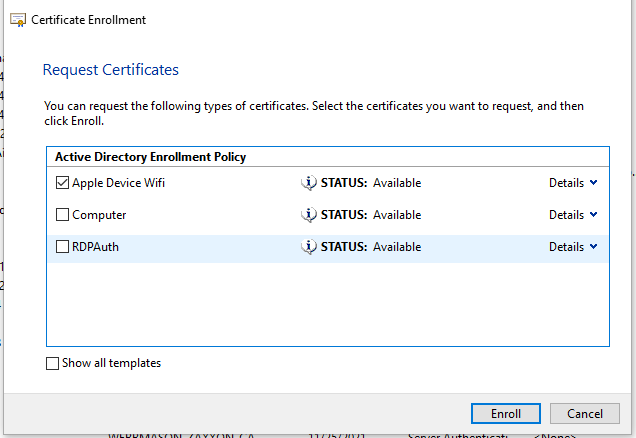
The response should be STATUS: Enrollment Pending

Navigate to the Certificate Authority Snap-in via MMC, or RDP to the server directly to access it.

You will see the Certificate request that you submitted from your workstation. The Request Common Name should again, match the hostname of the target Device.
Right click the request and select, All Tasks -> Issue.
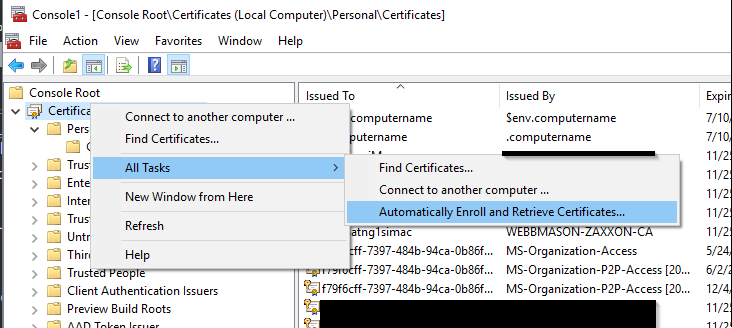
Back to the local MMC, right click the Certificates root and navigate to All Tasks -> Automatically Enroll and Retrieve Certificates
(If the Certificate Auto-Enrollment GPO is not applied to your workstation this does not work!)
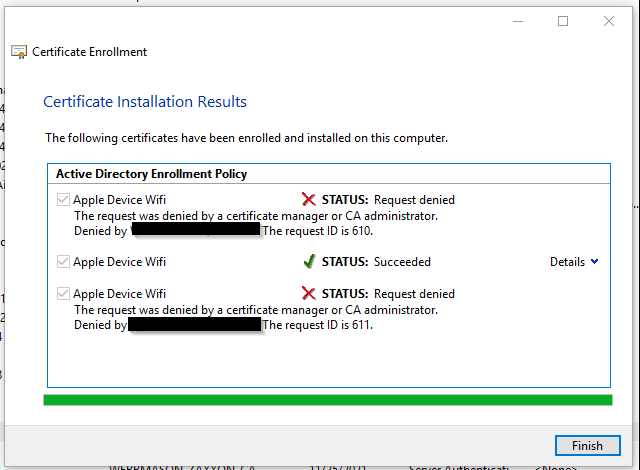
The Wizard will reflect how many Certificates are pending approval, ensure any or all are selected and click Enroll. The result should show Succeeded at the end of the Wizard
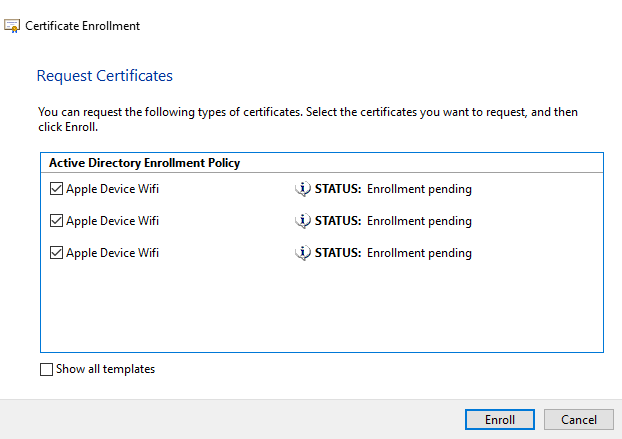
Note I had some test Certificates that I had denied. You should see no denials.
With this complete we should now see the certificate in your Personal Certificate folder as seen below…
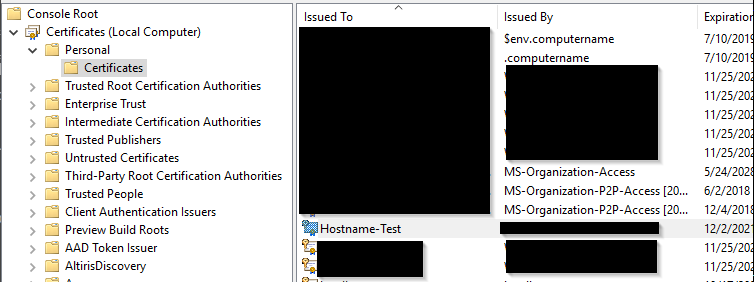
The Next step is to export the certificate. Right Click it, select All Tasks -> Export…
The wizard will open.
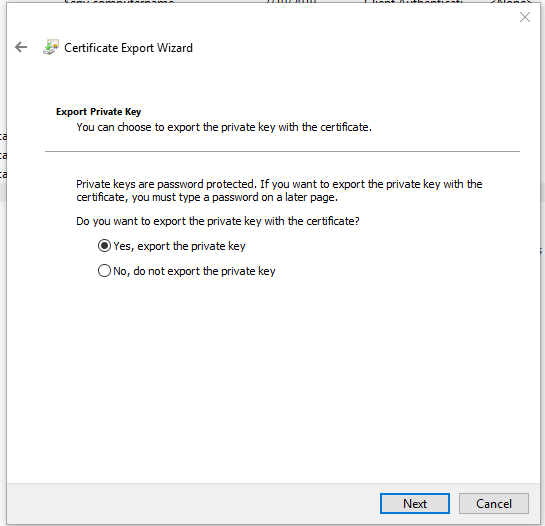
Do this twice. Once with exporting the private key, once without.
When exporting without the key, the format will be DER encoded binary or .CER
When with the key, it should reflect what is below.
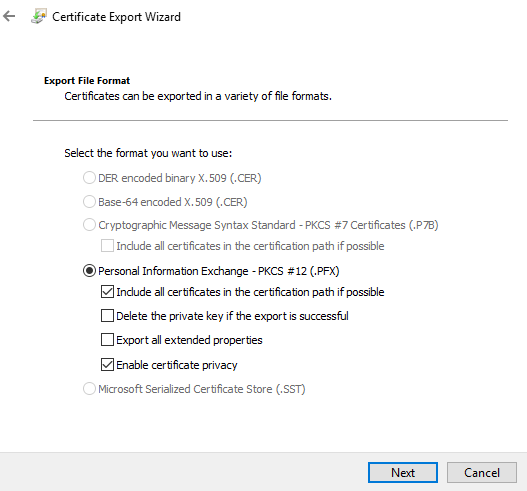
You must password protect the key. This password will be needed later when configuring the device!
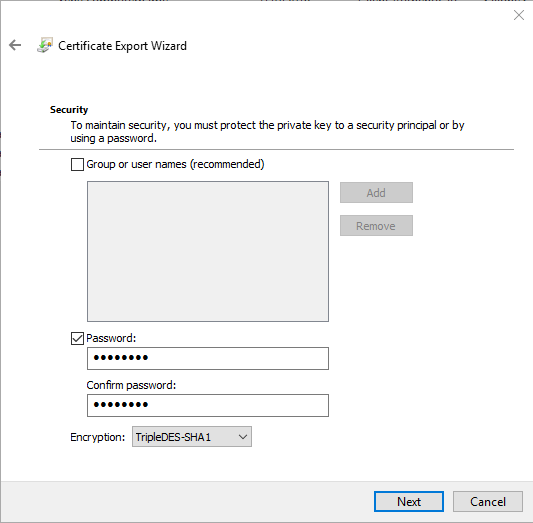
When you save it, make sure you specify which has the Private Key included and which doesn’t.
Before taking these Certificates to the target device, we need to create and entry in AD and map the new certificate to that entry.
Open Active Directory and navigate to the OU you created.
Create a new USER within this OU.
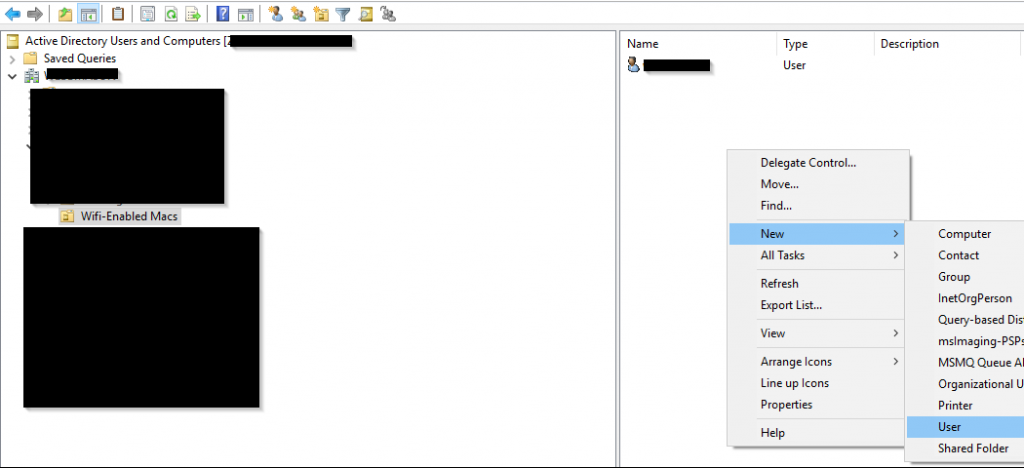
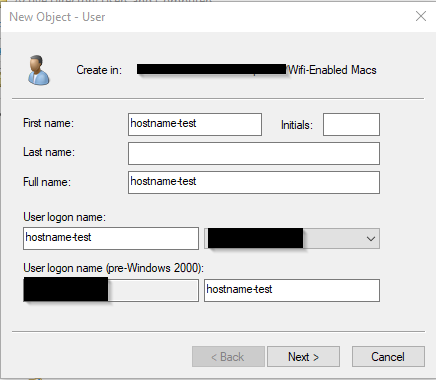
The user logon name must match the Apple Device Hostname.
Generate a SECURE PASSWORD. There is no need to record this information, in fact it should be disposed of.
Set options as seen below.
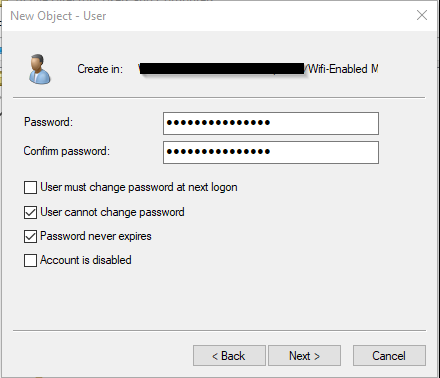
Proceed to finish the wizard.
Select View and Advanced Features within AD…
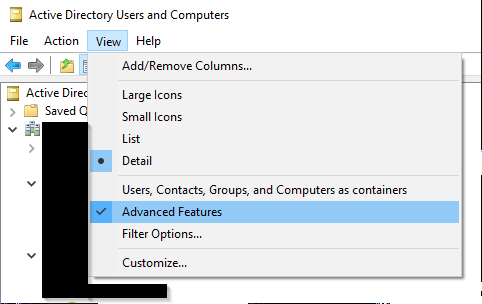
Returning to the OU with the new user, Right Click the user and select Name Mappings.
Click Add and select the appropriate Certificate WITH OUT the Private Key.
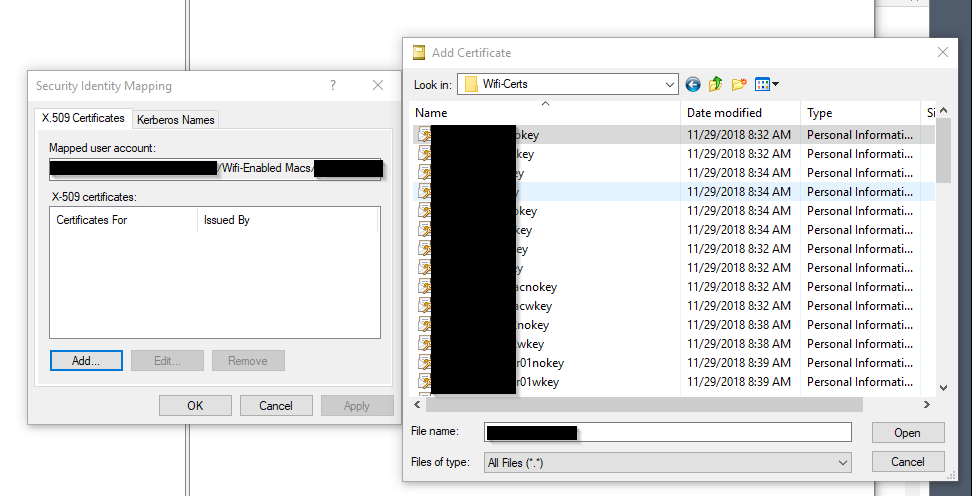
Selecting the certificate and clicking OK will result in the following
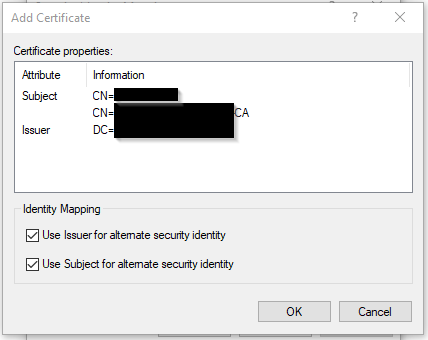
Click OK to proceed, then Apply and OK to complete the task.
Lastly, the new user should be added to a Security Group that prevents login or other network access.
Wrap up
That’s about it. The last step is installing the certificate with the key to the client machine and configuring the network there. I’m not going to bother touching on that, I feel there’s plenty of resources on the web for installing an 802.11x cert on a mac once it’s created.
I hope this helps, goodluck.
